home aboutme myart books shop
Showing posts with label sewing. Show all posts

Friday, 3 March 2023

Harry Potter Fabric

A few years ago my sister gave me some scraps of Harry Potter fabric and since then they have just been sitting in my fabric drawers, waiting.

Then this past week I finally dug them out and made something with them!  

Here's what I had to work with. The pieces are very small and some have the house crest very close to the edge. And sorry Hufflepuffs, you don't get represented here. I don't know why there isn't fabric for all four houses, this is just what I was given.


The first thing I made was this Slytherin zipper pouch, as that was the biggest piece I had to work with. I used some black fabric, including some black leatherette, and matching green ribbon.

I then made a Gryffindor pouch but didn't have a strip of the fabric long enough to fill the pouch, so instead I cut out the crest, gave it a felt border and sewed it to some matching red fabric.

With a few more pieces of the fabric I made these hanging decorations. To make these I cut out the shapes using my Cricut and added some iron-on interfacing behind the fabric. Then I sewed the pieces together, adding in these strings of shiny beads.
I could see these hanging on a Harry Potter fan's Christmas tree. It's a shame about that missing Hufflepuff fabric as it would have been nice to make a whole set.

It was great to add a few more items to my craft fair stock using materials that I already had. The various fabrics, zips, felt and embellishments all came from my craft stash, which shows that I should never throw anything away as you never know when it'll come in useful!

Thursday, 30 September 2021

Black and White Baby Blanket + Baby!

My lack of blogging over the last few months has been because I've been busy growing my house and growing my family. It's been a busy year! More on my house extension another time, but first: here's my baby!

When my maternity leave started in September one of the first things I wanted to do before my son arrived was make him a blanket. I'd read that newborns like high contrast black and white patterns so I started by going through my fabric stash and pulling out every black and white piece I have and cut out squares from them.

These are the patterned squares which include a few oil cloth pieces to vary the textures.

These are the black squares which include some leather effect pieces, a velvet piece and a suede piece, as well as regular cotton.
I also cut out a number of white squares but I only had white cotton fabric so they're not particularly interesting.

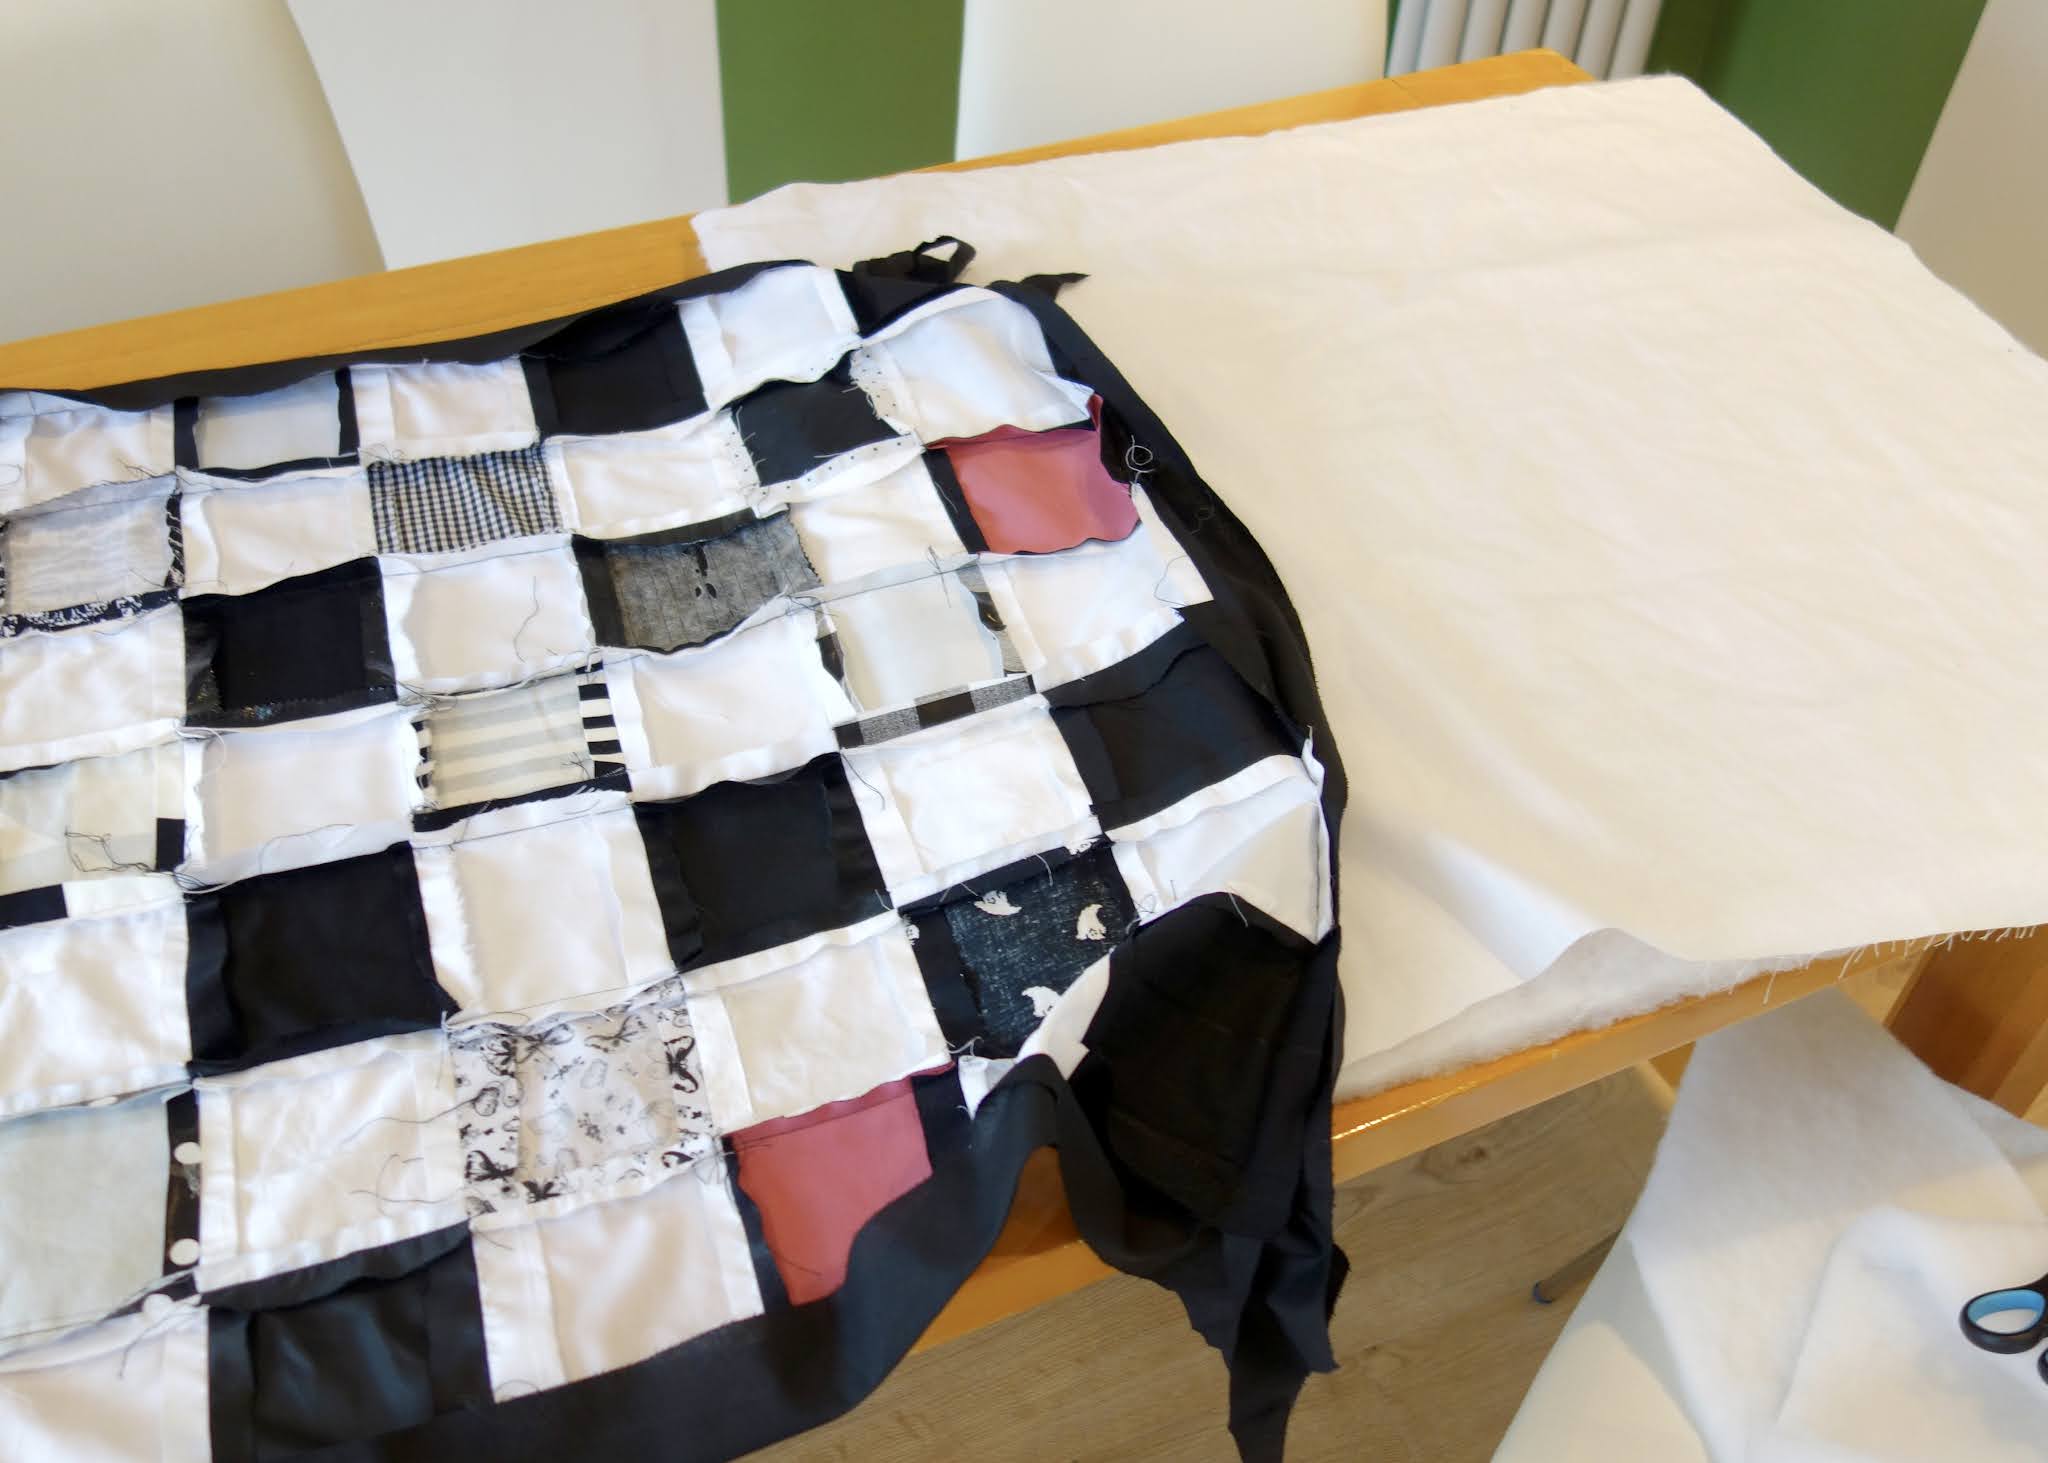
Once I'd cut out my squares I laid them out, alternating between black, white and patterned pieces.

I collected the squares into piles of each row and sewed them together into strips, using a 10cm square piece of paper as a size guide.

Once I had all the rows sewn I attached them all together.

I then sewed long strips of plain black fabric around the edge of the patchwork as a border.

Next I cut a piece of wadding and a piece of plain white cotton fabric the same size as my patchwork layer.

I sewed the black strips around the edges all three layers and also tried sewing across the layers in true patchwork style. This got a little untidy where the fabric started the crease, especially on the back, but not bad for a first attempt at this sort of thing.

Then I just needed to tidy the loose threads and then out the blanket in my son's arrival, which happened a few weeks later.

And here he is at 6 days old trying out the blanket for the first time. I think he liked it!

Saturday, 19 December 2020

Christmas Canvas Banner


This Christmas banner is another craft project that I completed during the first lockdown. I often get ideas for Christmas projects during the Christmas period, by which point I'm too busy with my Etsy shop to make them happen. So I made use of all the time at home earlier in the year to make some of these Christmas ideas. 

I started by cutting out two banner shapes from canvas and drawing a circle on one of them.

I used my Cricut to cut out holly leaf shapes from different shades of green felt. Then I sewed them around the circle on the canvas.

I printed out a 'Merry Christmas' template and sewed over it with red embroidery thread. Then I tore away the paper when it was finished.

I forgot the take photos of the final stages! Oops!
I sewed the two canvas pieces together, right sides in, then turned them right sides out. Then I folded the top over, enough for a wooden dowel to fit through, and sewed that in place.

I also added some red pom poms on the front as holly berries.

Then I added some ribbon so the banner could be hung.

It turned out so good! Hopefully next year Christmas craft fairs will be back and I can find a home for it.

Friday, 11 December 2020

Patchwork Christmas Stocking


Last summer my sister was helping me sort through my fabric drawers and encouraging me to get rid of the little scraps. She noted how much Christmas fabric I have piling up and suggested that if I hadn't used any of it in a year then I should probably re-home it.

So in order to save my beloved Christmas fabric I made this patchwork stocking!


I started by drawing out a template of a stocking on brown paper. I made two of these so that I could cut one up into the sections I had drawn out.


I used the paper sections to cut out shapes from my Christmas fabric. I'd labeled the sections with letters so that once they were separate like this I knew how they'd go back together.


Then I started sewing them together on my sewing machine, in pairs or threes, according to the template.


Then I joined the smaller groups together to form one big piece.


I cut out a back piece from red fabric and placed it with the patchwork front, along with some interfacing, and sewed them together.

I turned the stocking right side out and made a lining using the same stocking pattern and the red fabric.


Then I added a fabric loop so the stocking can be hung up.


It's a perfect celebration of all my Christmas fabric!

Sunday, 15 November 2020

Crochet Baubles

One of the things I spent lockdown (the first one...) doing is building up my stock of these crocheted baubles. 

I had bought a big box of red and white baubles in the January sales from Poundstretcher which were perfect for these decorations.

The first stage was to paint the baubles a base colour so the original colour wouldn't show through any gaps in the crochet.

As you know, my Mum is the crochet wizard, not me, so during a doorstep drop off of some groceries to my parents I handed over a box of painted baubles with drawings of extra pieces I needed like ears and scarves. Then a couple of weeks later I picked them up; all crocheted and ready to decorate. Probably in exchange for some bread flour or yeast that I'd managed to get hold of.


Most of my designs were straight up Christmassy - Rudolph, Christmas pudding, Elf etc - but I also tried some other things like these animals. They were all made by cutting out felt pieces which I sewed to the wool.

My favourite design is this BB8. It took a lot longer than the others but I think it looks awesome. I must try making a Yoda next...

Sunday, 11 October 2020

Custom Order Book Covers


I recently had a request from an Etsy customer to make fabric book covers for her pet's medical records, after she saw the notebooks I have in my shop. This customer had already bought some felt keyrings of her dogs so she wanted the books to match.

 I sent her a photo of all the fabric I thought would be suitable for this project and she picked this blue and white striped fabric with embroidered hearts.

To make the covers I cut out a long rectangle of the patterned fabric, as well as a matching one in plain white which would be the inside. I cut out the animal faces and sewed them to he patterned fabric. The two dogs were based on existing patterns I had, just with a few colour changes, but the cat I had to design from scratch. 

With back sides of the two pieces of fabric facing I sewed along the top and the bottom and one of the sides. I turned them right side out and inserted two pieces of card to give the cover some sturdiness. I then sewed up the remaining open side

I made the fabric pieces extra long so that I could fold in the sides, and sew in place, to create pockets for the covers of the medical records to slide in to.  


Making these covers involved a bit of trial and error but the customer was so pleased with them and said the records fit perfectly.

Tuesday, 23 June 2020

Bunny Dolls

I'm definitely spending more time on Pinterest at the moment. One thing I keep seeing is cute, and often quite stylish, animal dolls. So I had a go at making my own.

This is the first one I made. A little bunny in a knitted jumper and jeans.
I found some cotton fabric that looks just like patterned denim, which is perfect to use as it looks like jeans but isn't as thick as real denim so it easier to work with.

I made the jumper by knitting four squares; one for the front of the jumper, one for the back, and one each for the arms. I sewed them together directly on the doll. I only had two balls of wool at home; black and sparkly pink. It wasn't hard to decide which one to use!

My second bunny is wearing dungarees and boots. Putting this one together was a bit more complicated than my first one.

I used more of the denim-looking fabric to make the dungarees. The waist band was a later addition to cover up the tricky time I had connecting the trousers to the top!

Both bunnies have black boots made out of this leather-looking fabric. I really like having a mix of textures to replicate real life clothing, rather than making it all out of cotton.

A trick I got from one of the examples on Pinterest is to use lace as a layer on the ears for added texture, which I did for both of my bunnies. One of this bunny's ears got a little wonky during the sewing machine stage, but I think it just adds character.
I also made a headband from ribbon and felt and a flower embellishment. Cute!


I'm loving having time to try out new things and make things just for fun.
What other animal dolls should I make?

Monday, 15 June 2020

DIY Fabric Baskets


In another attempt to use some of my fabric stash I made these fabric storage baskets. Who can resist a storage basket!

I didn't take many photos of the process as the tutorial I followed does a much better job at showing how to do it. I used this tutorial by Fabric Mutt as a guide for making my baskets.

I altered the size of my baskets and did something different with the tops, but that tutorial is a great starting point. I also added a piece of card to the base of the basket, underneath the lining, so keep it square and add some strength.

I also tried out different things for the handles. For this one I made a strip of fabric and sewed the ends to the baskets with two buttons.

Shout out to my sister for this awesome unicorn fabric!
This fabric is a bit thinner than the navy florals so I added some interfacing behind it for some added support.

Now that I know how to make these baskets I'd love to go bigger and make a whole range of baskets.

Tuesday, 9 June 2020

Handmade Bear

I'm continuing to work through my fabric stash and this project came about after pulling out my Grandad's old cardigan that I'd already cut up for this wooly hat. (I made that hat 10 years ago! Which shows how long I like to hold on to things.)
I'd seen some cute handmade bears on Instagram and thought the cardigan would be perfect to make my own.

I drew out a paper pattern and cut out two pieces from the cardigan for the body.


On one piece I sewed the face, and some markings using embroidery thread.

I sewed the body pieces together, right sides in, including the ears on the inside.

 After turning it right side out I stuffed the bear with polyester stuffing and sewed up the opening.

Then I made two arms which I stitched to the sides of the bear.

Cute right?
I really love the texture of the knitted cardigan, and it's a bit more forgiving than cotton.
I've still got some of the cardigan left so maybe I'll make a whole family of bears.


Related Posts Plugin for WordPress, Blogger...