home aboutme myart books shop
Showing posts with label christmas. Show all posts

Saturday, 7 December 2024

Christmas Gnomes


Something new I've made for this year's Christmas craft season is these Christmas gnomes. I know they're called gonks but that word just sounds weird to me.


These came about as I was looking for a way to use some cardboard cones that my Mum had given me. She got them from some wool that was given to her, which was wrapped around the cones. 
I asked her to crochet me some red and green hats for these gnomes and I put the rest of them together. The beards are made of some white fake fur, and the noses and arms are made of felt.

For some of the gnomes I put a pipe cleaner in the hats so they could be bent over, which I think looks very cute.


I really love this guy whose hat is decorated like a Christmas tree! I probably should have used a bigger pom pom on the top, but I didn't have one. Oh well, it adds character!

Take a look at how I made these guys in the video below, along with another idea for using the cones.

Saturday, 19 December 2020

Christmas Canvas Banner


This Christmas banner is another craft project that I completed during the first lockdown. I often get ideas for Christmas projects during the Christmas period, by which point I'm too busy with my Etsy shop to make them happen. So I made use of all the time at home earlier in the year to make some of these Christmas ideas. 

I started by cutting out two banner shapes from canvas and drawing a circle on one of them.

I used my Cricut to cut out holly leaf shapes from different shades of green felt. Then I sewed them around the circle on the canvas.

I printed out a 'Merry Christmas' template and sewed over it with red embroidery thread. Then I tore away the paper when it was finished.

I forgot the take photos of the final stages! Oops!
I sewed the two canvas pieces together, right sides in, then turned them right sides out. Then I folded the top over, enough for a wooden dowel to fit through, and sewed that in place.

I also added some red pom poms on the front as holly berries.

Then I added some ribbon so the banner could be hung.

It turned out so good! Hopefully next year Christmas craft fairs will be back and I can find a home for it.

Friday, 11 December 2020

Patchwork Christmas Stocking


Last summer my sister was helping me sort through my fabric drawers and encouraging me to get rid of the little scraps. She noted how much Christmas fabric I have piling up and suggested that if I hadn't used any of it in a year then I should probably re-home it.

So in order to save my beloved Christmas fabric I made this patchwork stocking!


I started by drawing out a template of a stocking on brown paper. I made two of these so that I could cut one up into the sections I had drawn out.


I used the paper sections to cut out shapes from my Christmas fabric. I'd labeled the sections with letters so that once they were separate like this I knew how they'd go back together.


Then I started sewing them together on my sewing machine, in pairs or threes, according to the template.


Then I joined the smaller groups together to form one big piece.


I cut out a back piece from red fabric and placed it with the patchwork front, along with some interfacing, and sewed them together.

I turned the stocking right side out and made a lining using the same stocking pattern and the red fabric.


Then I added a fabric loop so the stocking can be hung up.


It's a perfect celebration of all my Christmas fabric!

Friday, 6 December 2019

Christmas Hair Accessories


For this year's Christmas craft fairs I decided to make some Christmas hair accessories. Hair accessories were the first things I starting making to sell so it's always nice to come back to them and create some new items.


I made this holly hair clip because I wanted something I could wear myself at the fairs. I liked how my one turned out so I made a few more to sell. Nothing says Christmas like a bit of sparkle from the sequins!

I then made some smaller holly hair clips that come in pairs after discovering I have quite a lot of these red buttons which are perfect for these clips.


I also made this gingerbread man hairband which I think is so cute! I think I could easily make a whole collections of these, each with a different Christmas motif.


Wednesday, 2 January 2019

Happy New Year


Happy New Year!

I hope you all had a wonderful and relaxing festive period. You can check out the highlights of my break in the video above. I've been making these Christmas video for 6 years and I love looking back at the old ones.

I thought I would take this opportunity to take a brief look back at 2018 and share some things that maybe weren't mentioned on the blog.

Andrew and I ended up taking quite a few trips this year starting with Holland in February (I highly recommend the pancake boat in Rotterdam!). We also went to the South Downs and the Peak District, where we stayed in some great Air BnBs. Then we ended the summer with a holiday to Austria, visiting Vienna and Salzburg.

August marked us being in our house for a whole year and earlier in the year we got our bathroom re-done. It involved a week of showering at our parents' houses and using a bucket to flush the toilet but it was worth it!

We got engaged this year!
There's no big proposal story here. We just started looking at venues and went from there.


This year has been fantastic for my little craft business. I set up an Instagram account for my felt dogs (and other animals!) which has really helped it grow. Check out @lisasfeltfriends to follow along.
I made at least 55 custom felt animals this year, plus all the standard felt animals I sold in my Etsy shop.

How was your 2018?

Saturday, 1 December 2018

DIY Wooden Tree Advent Calendar

For the past two years my boyfriend and I had been using this advent calendar that I made. But because it was made out of cardboard boxes that had to be glued shut, and therefore torn open, it was time to replace it.
The size of the boxes was also a bit limiting when it came to buying things for each other to fill them, which is something I took into consideration when I started thinking of a new DIY advent calendar.


This is what I came up with.
A wooden tree with hooks to hang on numbered baubles. The baubles are stuck to 24 little gifts, kept in a box alongside, and when a gift is opened it's bauble is hung on the tree. So the fuller the tree, the closer we are to Christmas!


To make this advent calendar I got some thin lengths of wood and coloured them with wood stain so they would match some of the furniture in our living room.
I cut 6 pieces of wood in decending lengths for the branches of the tree, plus one long piece which would be the trunk.


Figuring out the sizes took some planning, especially since 24 doesn't easily work in a pyramid layout. So instead of the branches having 1, 2, 3, 4 etc baubles on them, mine go 1, 2, 4, 5, 6, 6.


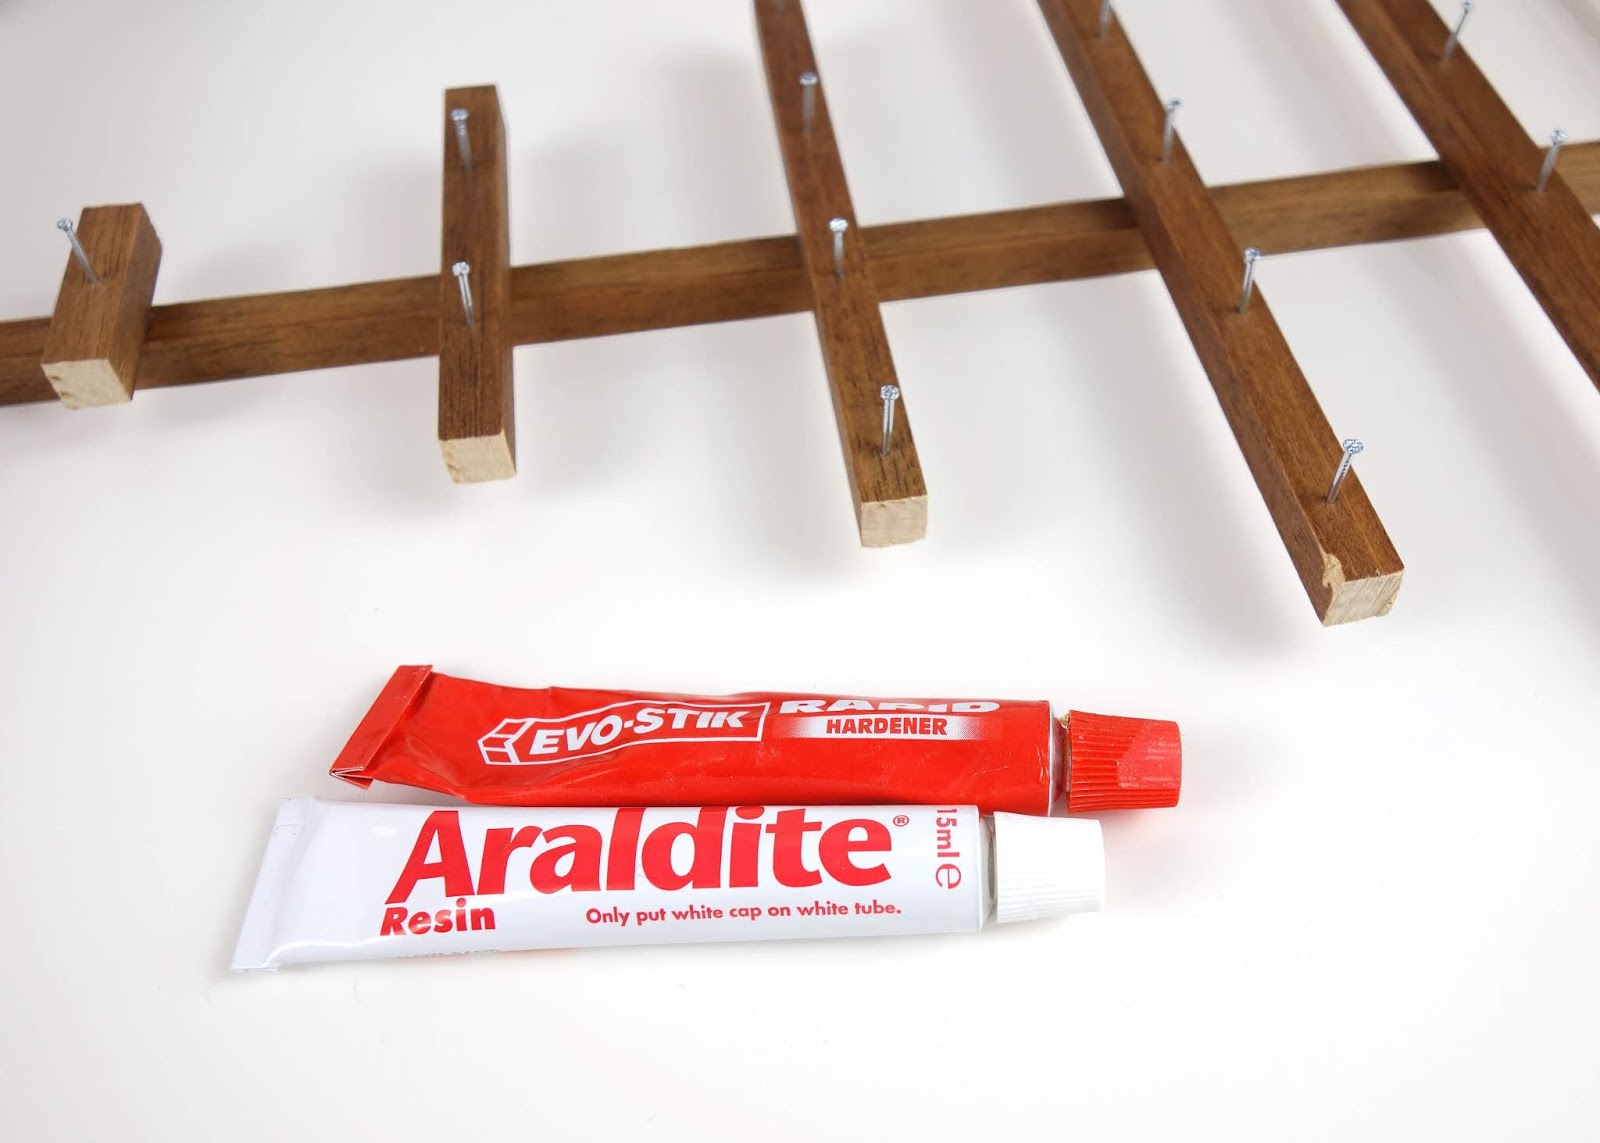
I hammered little nails into the branches which would be the hooks for the baubles to hang on.


Then I glued the branches to the trunk using a strong epoxy glue. It wasn't until I took this photo that I realised I used two different brands of tubes, but they still worked when mixed together.

I also screwed an eye screw into the top of the trunk and attached some twine so that I could hang the tree on the wall.


I bought two packs of 20 mini baubles, ommitted the glittery ones, and numbered the rest using a white paint pen. I might re-do this at some point using number stickers to make it look a bit neater.


Then all that was left to do was wrap the 12 gifts I bought for my boyfriend, which I've been gathering for the past month, and attach the baubles. Then I gave him the other half of the baubles for him to do the same with the gifts he bought for me...yesterday. But what's good about this advent calendar is that you don't have to have all the gifts ready on December 1st as you can add them to the box at any time. So it gives people who have had a particularly busy November a bit of wiggle room.

I really love how this turned out and I hope we'll be using it for many years to come!

Wednesday, 3 January 2018

Christmas 2017 Video

I hope you all had a lovely Christmas. I'm just popping in to share my Christmas video - enjoy!


Thursday, 21 December 2017

Character Gift Tags

 I felt like adding some personality to my gift wrapping so I decided to make these fun character gift tags. All I needed was some coloured paper/card and a glue stick.

To make the snowman I cut out a gift tag shape from white card. I cut two rough circles for the eyes out of black paper and five smaller circles for the mouth. I glued everything in place and added an orange triangle for the classic carrot nose.

For the Santa belt I cut a gift tag shape out of red card. I cut a strip of white paper with torn edges for the fur trim, which I stuck down first. I then added a strip of black paper for the belt, with a yellow square and black square on top for the buckle.

For the Rudolph tag I cut two gift tag shapes, one brown and one white, and sandwiched the paper antlers between them. I cut a large tan oval for the mouth and added Rudolph's signature red nose on top. I then used black and white card for the other facial features.

 Once I'd added some matching string through a hole in the top of the tags they were done.

There were really simple to make and I'm already thinking what other characters I could create in gift tag form.

Tuesday, 5 December 2017

Ribbon Hearts

I bought this pack of white wooden hearts from a charity shop for 50p a while back, and they've since been waiting in a drawer for inspiration. The inspiration came during the summer when I was in a seaside shop that had a Christmas section (I totally don't mind looking at Christmas decorations in August). There was a stripey patterned heart decoration that caught my eye and gave me an idea. The pattern on the heart in the shop was printed on but I thought I could achieve a similar look with ribbons.

I picked out all the Christmas ribbon I have in my stash and any other colours that would match. I coated the wooden hearts in PVA glue and laid the ribbons across it.

Once the glue was dry I trimmed the ribbon. I sealed the edges with some more glue to stop the ribbon from fraying.

 Then I made a hole in the top and put some shiny red thread through. 


These were really simple to make and a great way to use some of my ribbon stash.

Sunday, 22 October 2017

Painted Wood Slice Christmas Decorations

I've wanted to make these decoration for a while but only just got round to buying some wood slices. I really like the painted baubles I've done so I thought the same sort of paintings on wood slices would work really well as Christmas decorations.

 I bought a pack of 20 wood slices from Ebay and prepared them by painting a coat of primer and drilling a hole in the top so they would be able to be hung.

 I used acrylic paint and tiny brushes to create these little winter scenes.

 I also tried some other images which I think look good too.

I've added a few of these decorations to my Etsy shop along with some other new makes.

Wednesday, 4 January 2017

My Christmas Video


I hope you all had a lovely Christmas break. I had a great time seeing lots of family and friends. The only thing I asked for was some digital kitchen scales which shows how much of an adult I've become.
Here's my video of all the Christmastivities I got up to including; ice skating, my friend's winter wedding, a few trips to look at Christmas decorations, family gatherings and Christmas Day itself. Enjoy!

Thursday, 22 December 2016

Handmade Christmas Cards

Over the years I've aquired quite a lot of decorative bits; papers, ribbons, things pulled off old Christmas cards etc. So I thought I would use a few of them and make a few last minute Christmas cards.


The main part of this card, the bauble in the middle, was taken off of an old Christmas card, bow included. I then found paper and card that matched the colours to make the squares behind it. I put a scrap piece of gold ribbon behind and added the Happy Christmas, which I have on a sticker sheet.


I've got a whole pack of blank red folded cards which are perfect for Christmas cards. I added some poinsetta scrapbook paper to the lower half and some gold ribbon with a bow to the middle. The plastic gold angel, which I've placed on a paper circle, is another item I got off an old Christmas card.


 This card took the longest but I'm really pleased with how it turned out. First I had so pick out all the red sequins from various packs, arrange them in a tree shape and then stick them all down. I was watching CMAs Country Christmas at the same time which made the task less monotonous.

Do you like making Christmas cards? Are you someone who saves bits from old cards for later use?
Related Posts Plugin for WordPress, Blogger...