home aboutme myart books shop
Showing posts with label pendant. Show all posts

Wednesday, 13 January 2016

Wood Burned Feather Pendant

One of my Christmas presents was a wood burning tool which my Mum bought for me before I'd even said I wanted one. She's psychic!
I tried it out after Christmas and made this feather pendant.

I used the tool on some scrap wood to get used to it before moving on to the feather. It came with lots of different nibs and I discovered I prefer using the flat one instead of the round, more pen like one. 

Once I'd burned in my design I cut the shape out using a saw and sanded the edges.

I added a few more burned details, especially around the edges.


I drilled a hole in the top, using another Christmas present; a mini drill, and attached a jump ring and chain.

I love how it turned out and now I'm on the look out for scraps of wood, or wooden things in general that I can burn into. Wooden picture frame? Wooden spoons? Entire decorated table?

Tuesday, 30 June 2015

Nail Varnish Marbled Pendants

So we've all seen the marbled nail varnish technique by now, right?
Well I wondered what else I could use the technique on and I decided on necklace pendants.

I started by making and baking some rough pendant shapes from white Sculpey.
Then I picked out some nail varnish colours and dropped them on to the water.

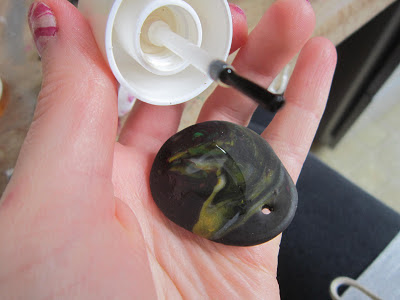
I gently dropped the Sculpey pendants into the water, scooped up the excess nail varnish, then picked out the pendant.
I inadvertently decorated my finger nails at the same time. I think I should have remembered the Vaseline trick.

After I'd sprayed the nail varnish with a coat of clear varnish I painted the edge of the Sculpey piece  with silver  acrylic paint. Then I drilled a hole in the top of the pendants and attached a jump rings and chain.

I also made a gold version with green and gold nail varnish.

What do you think?

Pin it!


Thursday, 4 July 2013

Fimo Pendant


When I was mixing the Fimo for these shell hairslides I noticed that all the bright colours mixed in with the black looked pretty cool.
So I took some of the Fimo and rolled it out, making an awesome looking pattern.
I shaped it and put in a hole, and made myself a pendant.

After I baked the Fimo the colours weren't as bright, but a coat of clear varnish fixed that.


I love the swirly, marbled colours.

I also made a long, thin pendant where the colours twist around it.

Oh Fimo, what did I do without you?

Thursday, 25 April 2013

Matchstick Pendants

When I was at uni I bought a bag of these wooden matchsticks one weekend thinking they would be useful for my model making, only to find that my friend Natalie had bought me the same thing.
I thought it was about time I did something with my abundance of matchsticks.
Ok, this project only used 18 of them, but it's a start.

I started experimenting with shapes that I could make using the sticks, and UHU'd them together.
I also added some E6000 to make sure they didn't fall apart.

I painted them black, added a jump ring, and hey presto; geometric pendant.

I think they look pretty cool.
I picked black because my outfits tend to be black + another colour, so I figured they pendants would go with most things I wear.
I don't know how long they'll last, because they are just glued together, but they're doing all right for now.

Wednesday, 18 May 2011

Spreading the craft

I recently took part in a craft swap hosted by Kelsey over at Artichoke Designs.

I made something for Katie from Sweet Rustic who is from Australia. My little package took 3 weeks to get there!

Based on the aesthetic of her blog name I made Katie this pendant. I (or rather my Dad!) cut the wood and I sanded it to a round shape. Then I painted on the rose and varnished it and added some pretty pink ribbon.

I also sent Katie this pair of simple earrings that I put together.

I think the craft swap is still going on so head over to Kelsey's blog to take part.
Related Posts Plugin for WordPress, Blogger...