home aboutme myart books shop
Showing posts with label crafts. Show all posts

Tuesday, 23 May 2017

Baby Groot Figurine


Have you seen the new Guardians of the Galaxy film? It's awesome. One of my favourite parts is when the now tiny Groot is dancing around at the begining. What a cutie. He's a funny little character that I've decided to immortalize in Sculpey.

I started by making an armature out of garden wire and card. I made a template by tracing the dimensions from a photo from the film that I'd enlarged to the size I wanted the figure to be. I made the armature using this technique I learnt at a model making course.

Then I started covering the armature in Sculpey. I decided to form the head around a ball of foil so that the Sculpey was roughly the same thickness all over. Without the foil the head would have been way thicker than the rest of the body.


Once I had the shape of the body I added the details. This mostly involved rolling tiny bits of Sculpey and attaching them to the body to look 'branchy'. I also added a bark texture using a craft knife and other modelling tools.
I wanted the model to stand up on it's own so I had to make the legs a little wider, but I don't think they look too out of proportion. Since you can't tell from the photo, the figure is about 3 inches tall.

After I'd baked the figure in the oven I painted it with acrylic paint. I started by going all over with one colour, making sure to get in all the little bits with a small brush.


I couldn't stop at just one Groot so I also made a model from the bit in the film when he's sitting in the space ship eating candy.


I think I like this one better as the proportions are more accurate and I got to show more expression.

These were so fun to make I'm tempted to make ones for all his dance moves!

Wednesday, 17 May 2017

Birthday Beer Box

My boyfriend's Dad's birthday was this past weeked and as part of his present we'd bought him a few bottles of beer. Andrew asked me if I could do something with the bottles to make them look a bit more 'gifty'.

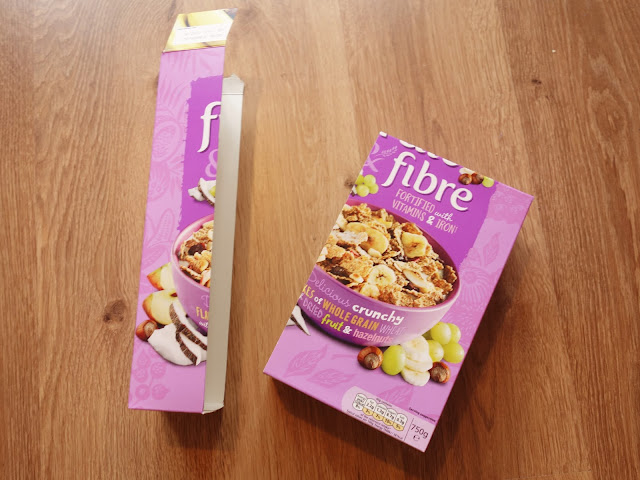
All I needed was a cereal box to make this birthday beer box. Ok...and some extra card and paper. But mostly a cereal box.

First I cut the cereal box to the height I wanted. The cereal box happened to be just the right width to fit the bottles in. I measured the length of the three bottles and cut the box accordingly, using the excess to make a new side on the open end.

As the bottles were quite heavy I used some corrugated card to reinforce the cereal box. I cut four pieces of card and stuck them to the inside of the box.

 To decorate the box I cut some brown packaging paper to fit around it.

Before I stuck the paper to the box I wrote the message. To make it look fancy I just googled 'birthday calligraphy' and traced it straight from the screen. I used a black felt tip to go over the outline and then fill it in.


I think it's a great way to make gifting bottles a bit more special. Perfect for a Dad. But if it was my Dad the box would be filled with ginger beer!

Friday, 24 June 2016

Antlers Necklace Display

When I lived at home I kept my necklaces on this guitar neck hanger I made, but now that I live in a rented flat I needed something else to display my jewellery on that wasn't such a permanent fixture on the wall.

So I came up with a papier mache deer head with gold antlers!

Most tutorials that I saw online used a shop bought head but I wanted to make mine from scratch (and not spend any money). I started by cutting out the profile of a deer head from corrugated card and an oval shape for the back of the head; the part that would go against the wall.  

I then started packing scrunched up newspaper around the card, securing it with masking tape, to start making the shape of the head.

I papier mached a few layers of newspaper all over the head and added details like lips and nostrils on the final layer. I also did a couple of layers of kitchen towel, channeling my inner Neil Buchanan.

For the antlers I used some thick wire which I put through the head and out each side. 

I then covered the wire in aluminium foil because I'd seen someone do that on one of the tutorials and it seemed like a good idea. I papier mached over the foil, paying particular attention to where the antlers meet the head as this part needed to be very strong to keep the antlers up.

I decided to spray the antlers gold and paint the head white for a sleek, modern look.


I hung the finished product on the wall by wrapping fishing wire around the base of the antlers and hanging it on an existing nail in the wall of my living room. 

This photo was taken a few days after I put my necklaces on and the antlers have dipped a bit under the weight of the jewellery but I don't mind because at least they haven't fallen off completely. I'm just happy that it looks like what it's supposed to.


I'm really please with how this turned and it adds a bit of character to the room whilst still being a functional piece.


Pin it!

Thursday, 9 June 2016

Mini Wooden Pallet Coaster

As you may know I love miniature things so when I saw these mini wooden pallet coasters on Pinterest I had to give them a try myself. Plus the project only requires two things; lollipop sticks and a glue gun, and I have both of those things!

I started but cutting the curved ends off the sticks using a craft knife, which was probably the most time consuming part of this project.

Then I got out my mini glue gun and stuck the sticks together. I realised I'd never actually used my glue gun before but I can see the benefits of an almost instant stick.

And then it was done. A nice quick and easy project.
I've still got a whole bag of lollipop sticks so I might make enough to put on every surface of my flat!

Friday, 1 April 2016

Wood Burned Owl Pendant


I've been using my wood burning tool again, this time to make an owl pendant.

I roughly drew out the design on a piece of wood before going over it with the wood burner. I have to be careful about doing too much as you can't undo any marks.

When the design was finished I cut around it and sanded down the edges.

I touched up the edges with the burning tool. For this design I used the small point nib which worked well for all the little feathery detail.

I drilled a hole in the top and attached a few jump rings, a random metal ring, and a chain to make a cute necklace.

Wednesday, 13 January 2016

Wood Burned Feather Pendant

One of my Christmas presents was a wood burning tool which my Mum bought for me before I'd even said I wanted one. She's psychic!
I tried it out after Christmas and made this feather pendant.

I used the tool on some scrap wood to get used to it before moving on to the feather. It came with lots of different nibs and I discovered I prefer using the flat one instead of the round, more pen like one. 

Once I'd burned in my design I cut the shape out using a saw and sanded the edges.

I added a few more burned details, especially around the edges.


I drilled a hole in the top, using another Christmas present; a mini drill, and attached a jump ring and chain.

I love how it turned out and now I'm on the look out for scraps of wood, or wooden things in general that I can burn into. Wooden picture frame? Wooden spoons? Entire decorated table?

Tuesday, 15 December 2015

Mean Girls Quote Tote Bag


As I mentioned on Sunday, this weekend my friends and I exchanged Christmas presents during a day of Christmas fun. We've been doing a Secret Santa since we were in middle school and this year I picked out my friend Robyn.
Robyn loves Mean Girls. She could easily do a one woman show of the movie. In fact, while I was working on this project I was getting whatsapp voice messages from her and my other friends quoting the film. 

That's why I decided to make this bag for her featuring a favourite Damien quote, 'she doesn't even go here!' with a stylized image of that part of the movie.
I got the bag from Hobbycraft and used fabric paint to add the image, outlining the words with Sharpie first.

I filled the bag with yummy treats before I wrapped it, as an extra gift, and Robyn loved it!

Thursday, 8 October 2015

Animating Morph

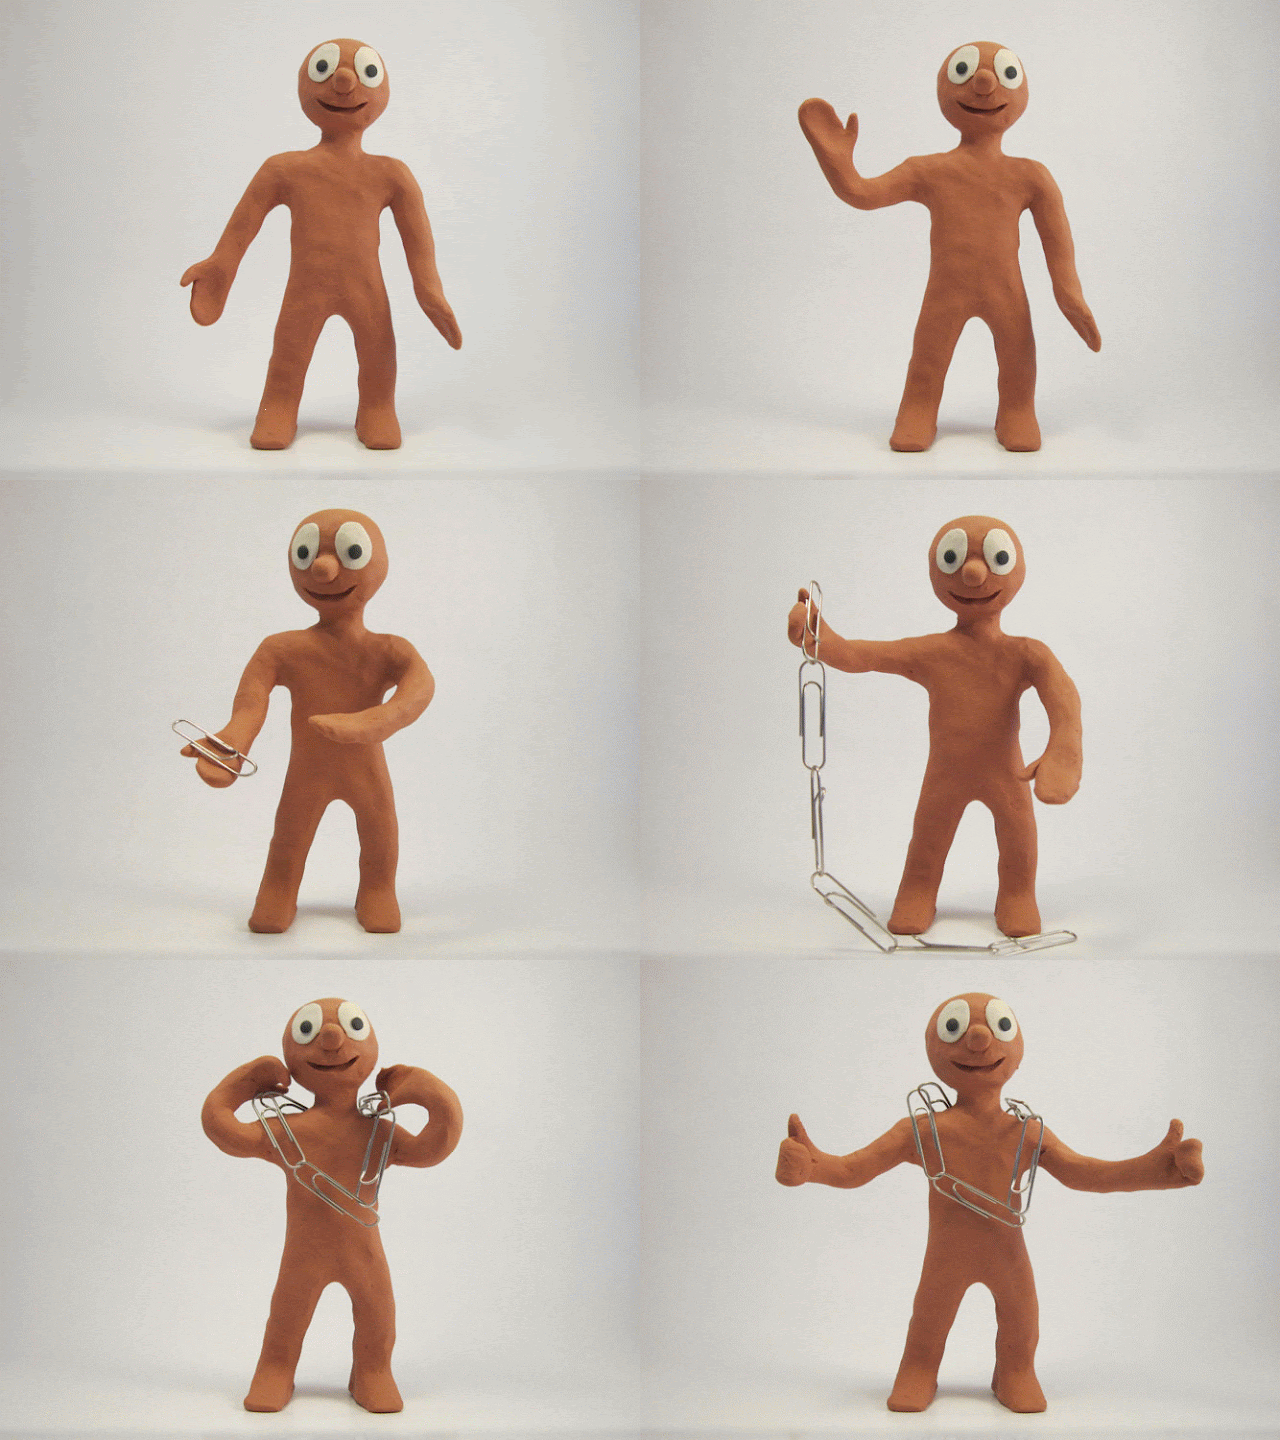
 At the Morph making workshop we were encouraged to take our Morphs home and try animating with them. So I did! I've done stop/start animation before and I really like it.

 This was my set up. I kept things simple by putting my Morph on a plain white background in my home made light box.

(Wait for it to load so it plays smoothly)
For my first animation I thought it would be really funny to make Morph do the Macarena - or 'Morpherena' - and it was. Though Morph wasn't completely steady on his feet and face planted a few times in between shots, and he missed out one of the moves of the dance.

Then I did a fun little magician scene using paper clips.

Now...how inappropriate would it be to make Morph twerk?

Tuesday, 6 October 2015

Printing on foil using digital ground

At school/work the 6th Formers are encouraged to experiment with different mediums. I've used gesso and gel mediums before but I'd never heard of digital ground so I took some home this weekend to see what it can do.

Digital ground allows you to print on usually non-printable surfaces. One example given is aluminium foil so this is what I tried.
First I spread the digital ground, which is a clear liquid, on to the foil. The instructions said to do two layers in opposite directions, allowing to dry in between, so that's what I did.
Shout out to foam brushes by the way. I'm a recent convert. 

Then I printed my image on to the foil using an ink jet printer. I printed a box the shape of my photo first so I knew where to position the foil on the paper, or 'carrier sheet' as a youtube lady called it. I used masking tape to keep the foil in place, sticking it on three edges.
The photo came out a lot clearer than I thought it would, though it was a bit pale, but this is probably because it's quite a light photo to start with.

Then I started thinking about what to do with the image.
I cut out layers of cardboard the size of the image to show the different rocks, using tracing paper to get he shapes exact. Then I stuck the 5 layers together using PVA glue.

I mixed some plaster with water and glue to build up some texture where the rocks were. I also put some glue on the figure to get some texture on the clothing.

Once the plaster and glue were dry I stuck the foil to the cardboard. I used this handy tool - sold as a nail varnish dotter in Poundland - to press the foil into the edges of the card without ripping it.

This is what it looked like with all the foil stuck down. Pretty cool but the image was still a bit pale.

So I tried painting on it using acrylics and that's when I found that the digital ground can do some weird things when it touches water. In some places it made the paint crack or crinkle, in other places it started washing off the foil and in some places it made the printer ink mix with the paint.

I added black and white paint to accentuate the highlights and shadows and I'm really pleased with how the rocks turned out. I think the face could do with some paint to fit in with the rest but I don't want to risk it because I don't know how the digital ground will react.

For a first experiment I call this one a success. What shall I try printing on next...
Related Posts Plugin for WordPress, Blogger...