home aboutme myart books shop
Showing posts with label upcycling. Show all posts

Tuesday, 9 June 2020

Handmade Bear

I'm continuing to work through my fabric stash and this project came about after pulling out my Grandad's old cardigan that I'd already cut up for this wooly hat. (I made that hat 10 years ago! Which shows how long I like to hold on to things.)
I'd seen some cute handmade bears on Instagram and thought the cardigan would be perfect to make my own.

I drew out a paper pattern and cut out two pieces from the cardigan for the body.


On one piece I sewed the face, and some markings using embroidery thread.

I sewed the body pieces together, right sides in, including the ears on the inside.

 After turning it right side out I stuffed the bear with polyester stuffing and sewed up the opening.

Then I made two arms which I stitched to the sides of the bear.

Cute right?
I really love the texture of the knitted cardigan, and it's a bit more forgiving than cotton.
I've still got some of the cardigan left so maybe I'll make a whole family of bears.


Thursday, 3 April 2014

Guitar Makeover 2

Remember the guitar I got given by my friend and made over? Well her brother was throwing out another guitar (I don't know how he gets through them so quickly) and I happily took it off his hands. And made it pretty.

I didn't want to completely paint over the guitar like last time as I like the original ombre colouring so I decided to draw on it with a white paint pen. I bought this one from Amazon.
What's good about it is it can be wiped off with a damp cloth so I could easily erase any mistakes I made when drawing.

I'd made a rough design on brown paper which I'd cut to the exact shape of the guitar. I googled a lot of mandala images to use as inspiration and incorporated elements of them into my design.
I free-handed the drawing on the guitar and don't mind the odd wonky line or not quite symmetrical parts. I started off copying my design but then improvised the rest based on the space left.


I also drew on the head of the guitar which was completed improvised with no design first.

Since the paint pen was so easy to wipe off I knew I had to seal it. I tried applying clear varnish to a small test spot on the head but this started wiping away the paint.
Then I started thinking about spray varnish and my Mum saw that there was some on sale at B&Q. I bought a can for £3. I had wanted a matt varnish but they only had gloss, but for £3 I'm not too bothered. It sure is stinky though.
After 3 or 4 coats of varnish the paint was sealed.

Then all I had to do was re-string the guitar, with help from this guy, making it left-handed of course.

Pin it!

Thursday, 10 October 2013

90s Patterns & Old Skirts


This is what happens when you take a hand-me-down skirt and a pattern from the 90s.

This project began with this copy of Essentials magazine from 1993.
My Mum has a box of dress patterns and I came across this magazine when looking for a pattern for a shirt.
Instead I found patterns for a summer wardrobe!

I decided I wanted to make this 'sun top' but make it part of a dress.

I used a skirt my sister had given me but I'd never worn and made the sun top to attach to it.
I made a few adjustments to the pattern like I made it back opening instead of front opening so it would line up with the zip in the back of the skirt.


I bought some buttons to match the fabric and my Mum stitched the buttons holes for me. She was a big help with this project as I haven't worked with a paper pattern before and the instructions in the magazine were a bit confusing.

I hemmed the skirt and made straps from the material I cut off.

I'm still not sure about the pleats in the skirt - which is why I never wore it in the first place - but other than that I really like this summer dress.
Except I'm going to have to pair it with tights and a cardigan if I want to wear it any time soon.

Thursday, 12 September 2013

Up-cycled Dress

This dress was another up-cycled project.
I love it!

 The dress started life like this.
It was actually my Mum's dress that she bought from a fashion show my school had.
My lower school. That's how old this dress is.

This photo also shows how long I've been meaning to do this project as it was taken in September 2011 right before I got my Mum to shorten it.
Then it stayed in my wardrobe for two years. Every so often I would think about it but never come to any conclusions on what to do with it.
Until last week.

 
I started by cutting the straps off the dress so it would sit lower.
I also added elastic round the middle so it would be more fitted.

I did this by sewing bias tape to the inside of the dress and threading the elastic through.

I found a t-shirt I never wear and altered the neckline to be more flattering, and then sewed the dress to it, re-shaping the dress where the straps had been.
Then I gathered the fabric at the front and sewed part of one of the dress straps over it.

I love how this dress turned out. I think it's so cute.

Thursday, 29 August 2013

Upcycled T-shirt Collar

Like my new shirt?
It's upcycled.

It started off as a plain white t-shirt and some unwanted material from my Mum's culottes.
In fact the t-shirt was once my Mum's as well. 

The strips of fabric were meant to be tied around the waist of the culottes, and were already the right size to be a collar so I just had to sew it round the neckline of my shirt.

To make the fabric go nicely around my shoulders I had it go down the back instead of straight across the neck.
I cut a new neckline for the back of the shirt and sewed the fabric on in a 'v' shape.

So now it looks just as interesting from the back as from the front.

I really like how this simple, and completely free, addition has made the shirt look much more fancy.

It looks great with this new skirt I bought on sale at New Look.
They sell this thing as a school skirt! I would not have got away with that in my day. It's tight y'all!
But that might be because I bought it size age 10-11...

Thursday, 22 November 2012

My G-ma's Bling

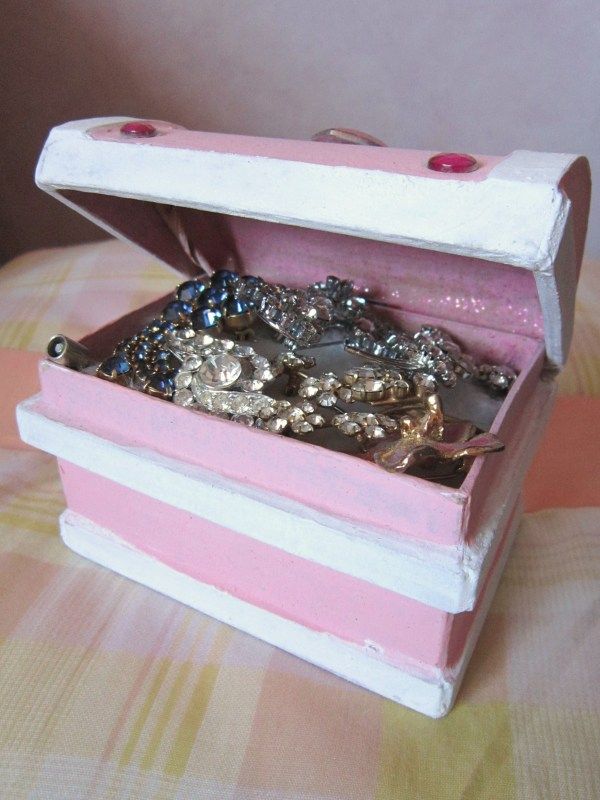
When my Grandma died in 2008 (aged 101 - good going!) I got some of her brooches.
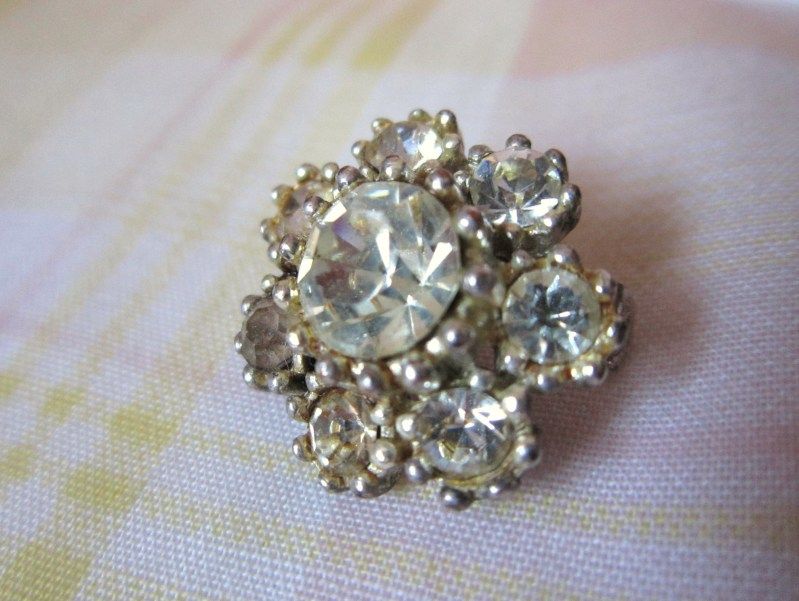
They're some serious bling!

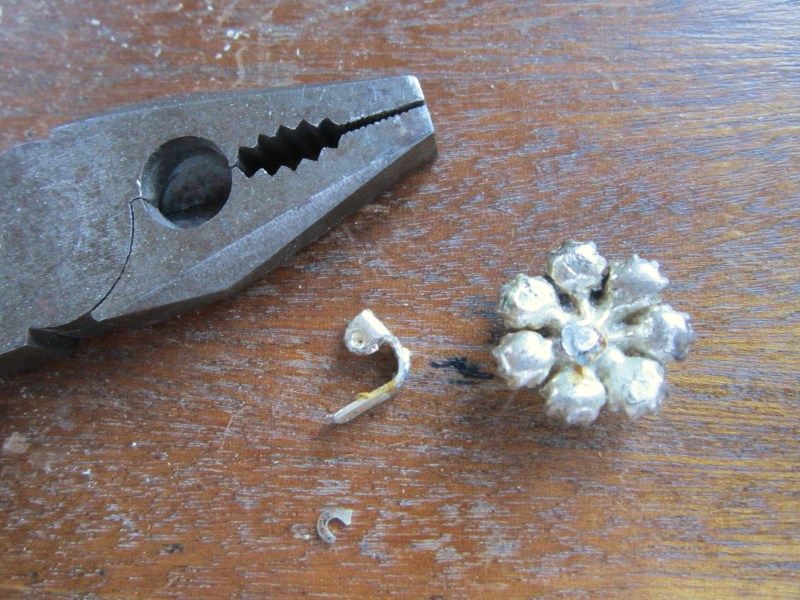
I love this little shiny-fest, but the pin on the back is broken, so I thought of an easy way to still wear it.

I pulled off the broken back with a pair of pliers.

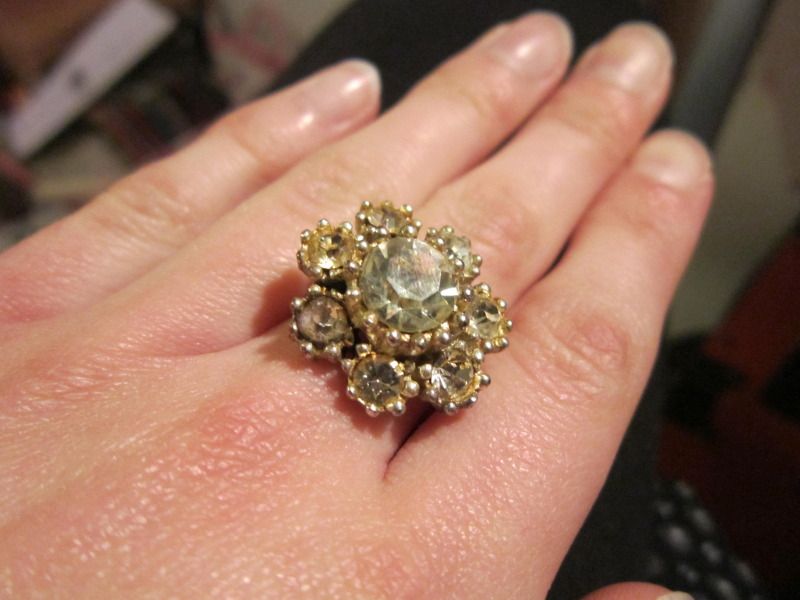
Then using my trusty E6000 glue I stuck a ring blank to the back of the brooch.

And there we go. The fanciest ring in town.

Have any of you been doing any up-cycling recently?

Wednesday, 22 September 2010

Sleepy Owl Hat


I was shocked the other day when my sister told me she really doesn't like hats with faces. Please tell me I'm not alone in thinking they are the darned cutest things ever!


In addition to my panda hat I now have a sleepy owl hat, and here's how I made it... 


I started with a Grandad cardigan, which was kindly donated to me by my Grandad as it had a hole in it.


I cut a section from the back of the cardigan, mine measured approximately 40x25cm to fit my head, and folded it in half and folded over the edges


The cardigan I used had suede pockets and strips down the front so I unpicked them and cut them into smaller strips. I tied these into two bundles for the fringey ears on the hat. These could also be made with felt or another kind of fabric.


Because I was sewing the hat inside out, I put the suede strips through the corners of the hat, with most of them on the inside. I then machine sewed the two sides, but had to hand sew through the suede as it is too thick for the sewing machine.


For the facial features I cut the eyes out of felt and the nose and eyelids from more of the suede. I glued these on with UHU glue and stitched around the edges to make sure they were definitely attached.


I then stitched around the eyes with white wool to create that signature owl look.


C'est fini


Now I'm ready for the impending winter.
Related Posts Plugin for WordPress, Blogger...