home aboutme myart books shop
Showing posts with label paper. Show all posts

Friday, 8 March 2019

Handmade Sketchbooks

Every time I see a post on book binding or handmade notebooks I always feel really inspired. I finally put the project on my to do list and this is what I came up with.

I really wanted my books to have a mix of papers to make things more interesting, and each one unique. I started by going through my over flowing drawers of paper and picking out pieces to use as the pages. I've got cartridge paper, lined paper, coloured paper, squared paper, sugar paper, patterned paper, tracing paper and more.

I cut all the paper into A5 sized pieces and then folded them in half to A6 size. My tip for doing this is to fold them against a stack of post-its so the edges are alligned. It doesn't have to be post-its though, anything with a raised, flat edge will do, eg, a book, a box.

I then cut some card for the covers. I made them a millimetre or two bigger than the pages. I used Amazon cardboard envelopes which I have a fair few of as I love the quality of the card.
I arranged all my pages into books, making sure to have a good mix of all the different types of paper.
In my first attempt I used staples to attach the pages together but I didn't love how it turned out, so I tried sewing the pages together.

I started by marking four dots, about 3cm apart, along the fold of the centre page. Then I took a drawing pin and pierced four holes through the whole stack of papers. You can't see from the photo, but I had a lump of blue-tack on the other side of the paper so the pin had someting to go in to instead of my table top. I put a scrap piece of paper over the blue-tack so that it didn't stick to my book pages.
I then used one of the pages as a guide to pierce holes in the cardboard cover.

Then I used cream coloured sewing thread, doubled up, to sew the pages and the cover together. I arranged it so the knot would be between the last page and the cover as this would be covered up later.

Next I covered the card cover with something a bit more attractive. This was a chance for me to use some of the really colourful fabric I have in my stash.
I cut the fabric about an inch bigger than the card cover and cut the corners off. I used PVA glue to stick the fabric to the cover, one side at a time.

I then glued the first and last pages to the inside of the cover to cover up the edges of the fabric. This is also how the knot gets covered up.

The last thing to do was trim the pages so they all appear the same size when the book is closed. 

And before I knew it, I'd made all of these!

I really enjoyed making these books. I love the mix of pages. Much more interesting than page after page of blank white.

I hope I've explained my process well enough. Let me know if you have any questions!


Thursday, 21 December 2017

Character Gift Tags

 I felt like adding some personality to my gift wrapping so I decided to make these fun character gift tags. All I needed was some coloured paper/card and a glue stick.

To make the snowman I cut out a gift tag shape from white card. I cut two rough circles for the eyes out of black paper and five smaller circles for the mouth. I glued everything in place and added an orange triangle for the classic carrot nose.

For the Santa belt I cut a gift tag shape out of red card. I cut a strip of white paper with torn edges for the fur trim, which I stuck down first. I then added a strip of black paper for the belt, with a yellow square and black square on top for the buckle.

For the Rudolph tag I cut two gift tag shapes, one brown and one white, and sandwiched the paper antlers between them. I cut a large tan oval for the mouth and added Rudolph's signature red nose on top. I then used black and white card for the other facial features.

 Once I'd added some matching string through a hole in the top of the tags they were done.

There were really simple to make and I'm already thinking what other characters I could create in gift tag form.

Friday, 12 December 2014

Hand Print Wreath

This is another idea I picked up from my new school. I saw a few of these wreaths in one of the classrooms and thought it would be a good activity for art club this Saturday.

To make the wreath  I drew round my hand on to green paper and cut it out. I ended up using 11 cut out hands.

Then I cut out a cardboard ring and glued the hands around it.

The palms of the hands need to be stuck down, with the fingers loose.

I decorated the wreath with red sequins and a red paper bow. I'm hoping the kids at art club will go crazy with their decorations because nothing says Christmas like using all of the glitter.

Friday, 5 December 2014

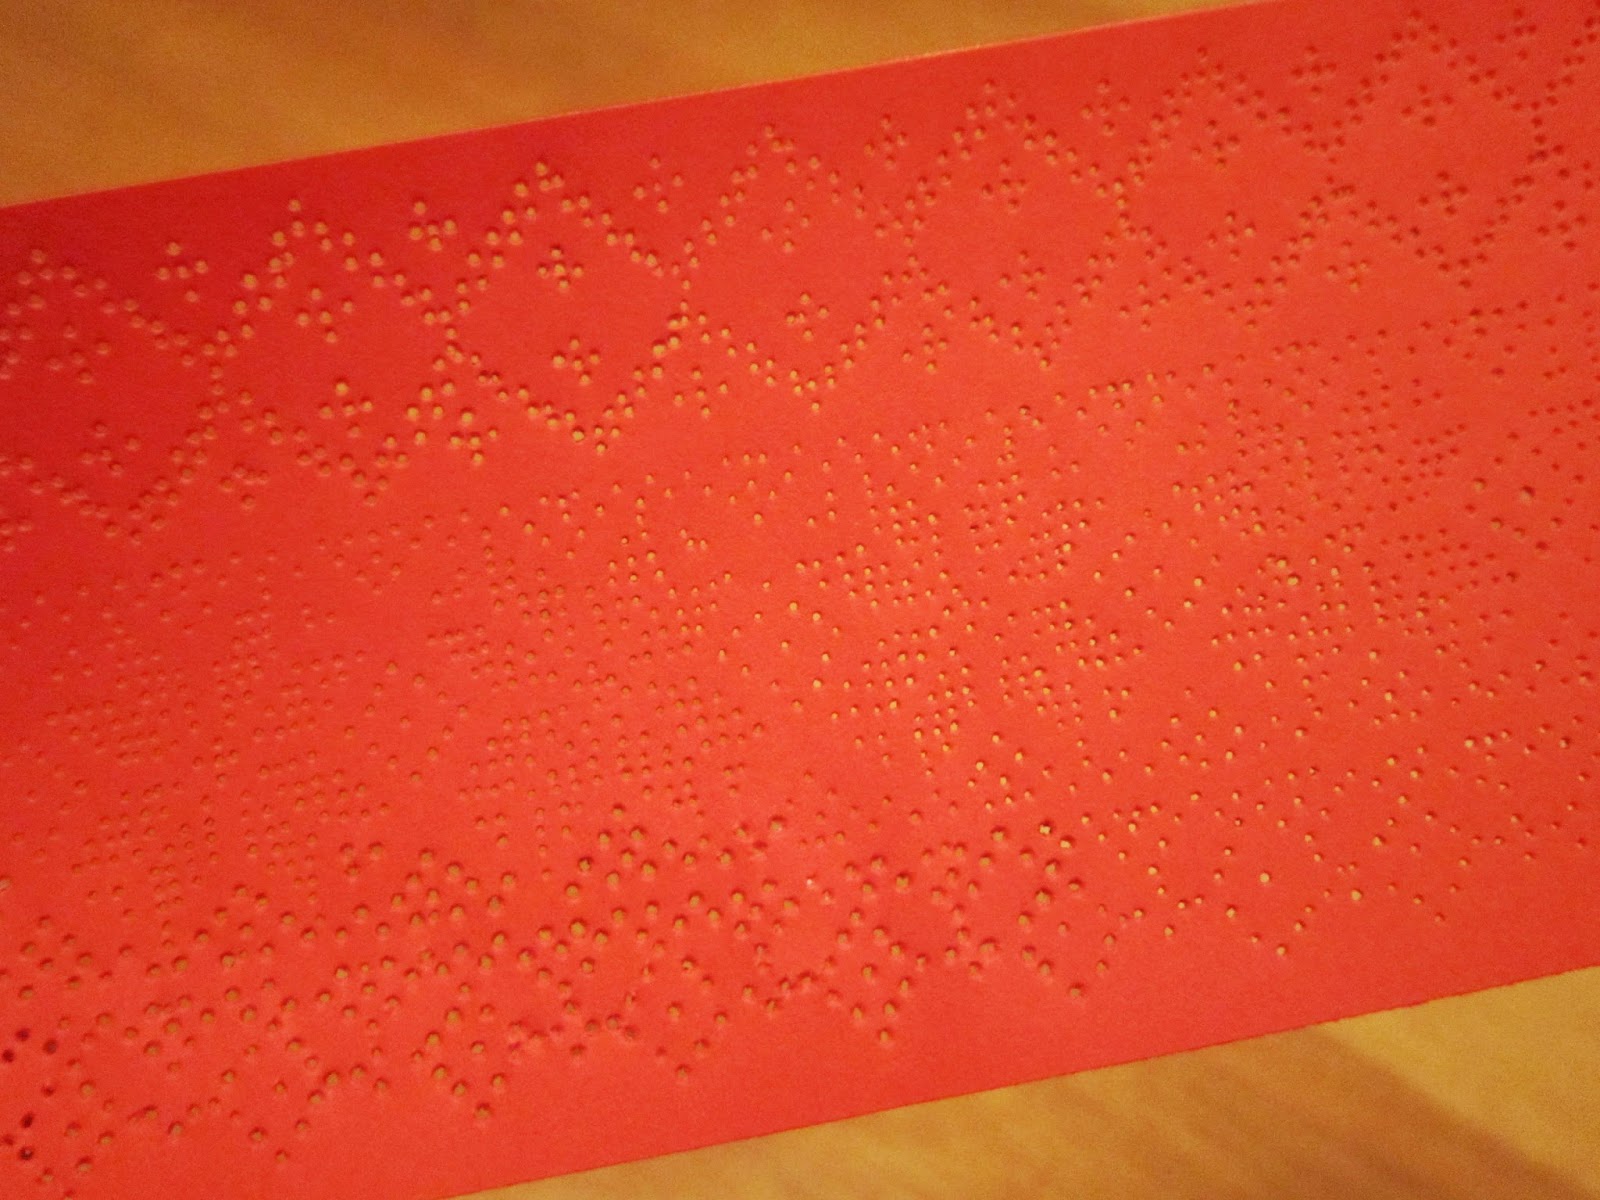
Nordic Pattern Candle Holder

Glowing candles, Nordic patterns and the colour red are all quite Christmassy which is why I love my latest DIY. Here's how I made this candle holder.

I printed a section of Nordic pattern off the internet and cut a piece of red paper the same size.

I layered the pattern paper over the red paper and paper clipped them to a piece of cardboard. Then with a needle I poked holes all over the pattern, going through both pieces of paper.

It took a very long time but I was really pleased with the result.

I then wrapped the paper around a plastic container and secured it with tape at the back.

To complete it I put a tea light candle in the pot, lit it, and enjoyed the Christmassy glow.

Tuesday, 2 December 2014

Paper Star Decoration

Next week I start a new job at a different school so I've been spending a few days there these past weeks to get to know it. I was there yesterday when they had a Christmas craft afternoon and I learnt how to make these star decorations.

After helping the children I wanted to try and make one myself so I took home one of the templates.

To make the decoration you fold a square of paper in half and cut along the lines from the template.

Then you unfold the paper and fold the middle section round one way, sticking it in place, then fold the next two bits round the other way and stick, and so on.

You need to make five of them to stick together to make the star.

The children made great big red and green stars which look great hanging around the school.

Tuesday, 14 October 2014

Paper Cut Birthday Card

For a recent friend's birthday I decided to make her a special card.

I wanted to do a paper cut card so that I could use my new craft knife which has a rotating blade, specifically for cutting around curves.

I drew out my image on blue card and then got to cutting. I had to make sure each element of the picture was connected so that it didn't fall out when cut around.

When all the cutting out was done I decided to put white paper behind the blue card to make the image stand out.
This is where I had a bit of a fail. I decided to use spray glue to stick the paper and the card, so I sprayed the back of the blue card. Unfortunately blobs of glue got through to the front of the card, there were stringy bits between shapes and the glue stained through to the front in places. 

Don't by cheap spray glue people! Get the proper spray mount stuff!

I stuck the card to paper anyway and tried to pick off the blobs of glue but it still looked messy. So I decided to paint over the blue card completely with blue paint. In hindsight this would have been better done before I stuck on the white paper because I kept getting bits of paint on the white paper which was very frustrating.
But the level of messy this created wasn't as bad as the hot mess it was before so it was an improvement.
And my friend loved the card!

Thursday, 24 July 2014

Bright Paper Pieces

More scanned paper fun? Ok then!

This one was definitely inspired by Katie's family photo collage. I like the black and white photo mixed with the simple, cartoony background. Kinda like Angela Anaconda! Some Saturday morning memories right there.
Like my previous experiments with this fun technique you have to compose the image on the scanner backwards, so you put the background on last, and then hope everything underneath has stayed in place.


For this one I wanted to brighten up the sky. I fanned out five pieces of coloured paper and put them on top of the black and white image. In Photoshop I flattened the colours of the background to give a contrast to all that texture in the rocks.


For this one I used a colour photo instead of black and white and fanned out coloured paper like in the previous piece. Then in Photoshop I reflected the background and added a ripple effect so it looks like I'm walking on water.

Thursday, 10 July 2014

Paper Confetti and Jumping Photos


More fun with photos, paper and a scanner.
I love how this one turned out. It makes me happy!

The first thing I did was find a photo of me jumping, which wasn't that hard because it turns out I have quite a few. The one I used was taken in Disneyland which would explain the jumping around.

I composed this image by placing the cut out photo of me jumping in the middle of the scanner, then I sprinkled on the tiny bits of coloured paper and put the letters in place, making sure to put them right side down.
Then I carefully put the piece of yellow paper on top and shut the lid.

I also tried it with white and black pieces of paper on top, but I think I like the yellow best.
I think the image would make a fun 'congratulations' card!


Then for fun I played around with what happens if you leave the lid of the scanner open.
I'm like Tinkerbell!

Tuesday, 8 July 2014

Paper Pictures


I made this thing!
This little project was inspired by the header on Dos Family. I don't frequent the blog but I saw it once and liked it, so I decided to make an image about me and my people based on it.

I selected my photos and made them black and white on Word, where I also put the triangle around them. 


Once I had all the bits cut out I started playing around with the composition. I used a piece of tracing paper over purple sugar paper for the background and layered the photos and triangle on top.

I took a photo of my chosen layout and replicated it on the scanner. Because nothing is stuck down I could easily move things around after seeing the scanned image.

This is the sort of thing that could be made on Photoshop, but it's nice doing it all by hand! Especially cutting around the main photo. I could never do it that precise on the computer. 

Tuesday, 13 November 2012

Crafting - 70s style

At the Arts Centre we're gearing up for our 'Now That's What I Call A Recession' festival this weekend, which is 1970s/80s themed.

I've been putting together craft projects from this 70s book for the kids to do at the festival.

Paper lanterns.

Tissue paper flowers.

A spinny thing...


A dragon!

And my favourite; these finger puppets.
I probably spent longer on them than I should have, but I don't care.
The cat even has a tail on the back!

Related Posts Plugin for WordPress, Blogger...