home aboutme myart books shop
Showing posts with label my miniatures. Show all posts

Sunday, 22 January 2023

Framed Minature House Commission

Today I'm sharing a recent commission I've just completed. It's a miniature framed house front.
I've made a front door like this before but not the whole front of the ground floor. The bay window was an added challenge!

And I was asked if I could possibly make a working porch light! This was quite easy once I found the right lights; a set of fairy lights with a slimline battery and switch. I only needed one light so the rest are hidden in the frame. 

All of the plants were another challenge which took a bit of experimenting but I ended up using a combination of bits of sponge, pot pourri, and dried mixed herbs.

I think my favourite thing about this piece is the hanging baskets. I found a couple of wooden beads that I was able to saw in half to use for the baskets. I built up bits of sponge for the plants and used an old necklace for the chain which I attached with small pins.

I cut a custom mount for the piece and found a shadow frame which had a bit of depth to house the porch section and keep everything neat. 

Friday, 26 March 2021

Miniature Kitchen Scene


Recently I've been flexing my miniature making muscles with a series of little kitchen set ups.
I started by making a little kitchen cabinet to be the base of the scenes. The work top is a sample of wooden window blind from when we recently redecorated my husband's office and was perfect for this use. All the scale measurements were made based on the size of this piece.

For my first scene I decided to make miniature toast, including a toaster, plate, jar of jam, knife and the toast itself. I had a few challenges with this, like, how do I make a jam jar? Answer; a wooden bead cut in half with the top of a split pin. 


Then I made a cookie scene because you know I like getting salt dough involved. In addition to the cookie dough I also made a bag of flour, a cookie cutter, a rolling pin, and a baking tray. I think the baking tray might be my favourite part!

Check out the videos below for a more in depth look at how I made these and what materials I used.
And let me know if you have any ideas for other kitchen scenes I could make.

Monday, 3 September 2018

Miniature House Ornaments

Do you remember the miniature pink beach house I made? After I posted it on my Instagram I was contacted by my favourite Etsy customer with a commission to make two miniatures houses; one of her previous apartment building and one of the house she lives in now.

Having spent most of my time at university making miniature models I always get excited at the opportunity to make something tiny. I like drawing out the plans, scaling everything down and seeing how much detail I can include.

Google street view was my best friend when working on this commission. The customer gave me the addresses of the two buildings so I was able to find them online and see them from different angles. Being able to view images from previous years on Google maps meant that if there was a blossoming tree obscuring my view one year, I could check to see if there was a photo taken in winter when this wasn't a problem.

I also find it really interesting looking at houses from other places. These buildings are in America and they look nothing like the houses I live around here in England.


I added ribbon loops to the backs of the models so that they can be hung on my customer's Christmas tree. She already has a felt dog ornament and another custom ornament so I'm slowly taking over her tree!

Tuesday, 13 June 2017

Deadpool Figurine


I really enjoyed making my Groot figures so I decided to make some more characters. Since the original template for the wire armature is for a person I thought I'd do a human figure and since Deadpool is a favourite in my house I gave him a go,


This is the wire armature made using this method. I covered it in Sculpey and started modelling. It was a lot trickier to get a good shape compared with making the Groots. In fact I thought about giving up about 5 times in the first 15 minutes, but I perservered!

 It was quite fiddly with all the different straps and pouches, and one of his guns broke and had to be glued back together. But in spite of that I think the finished product looks pretty cool.
 
Pin it!

Thursday, 1 June 2017

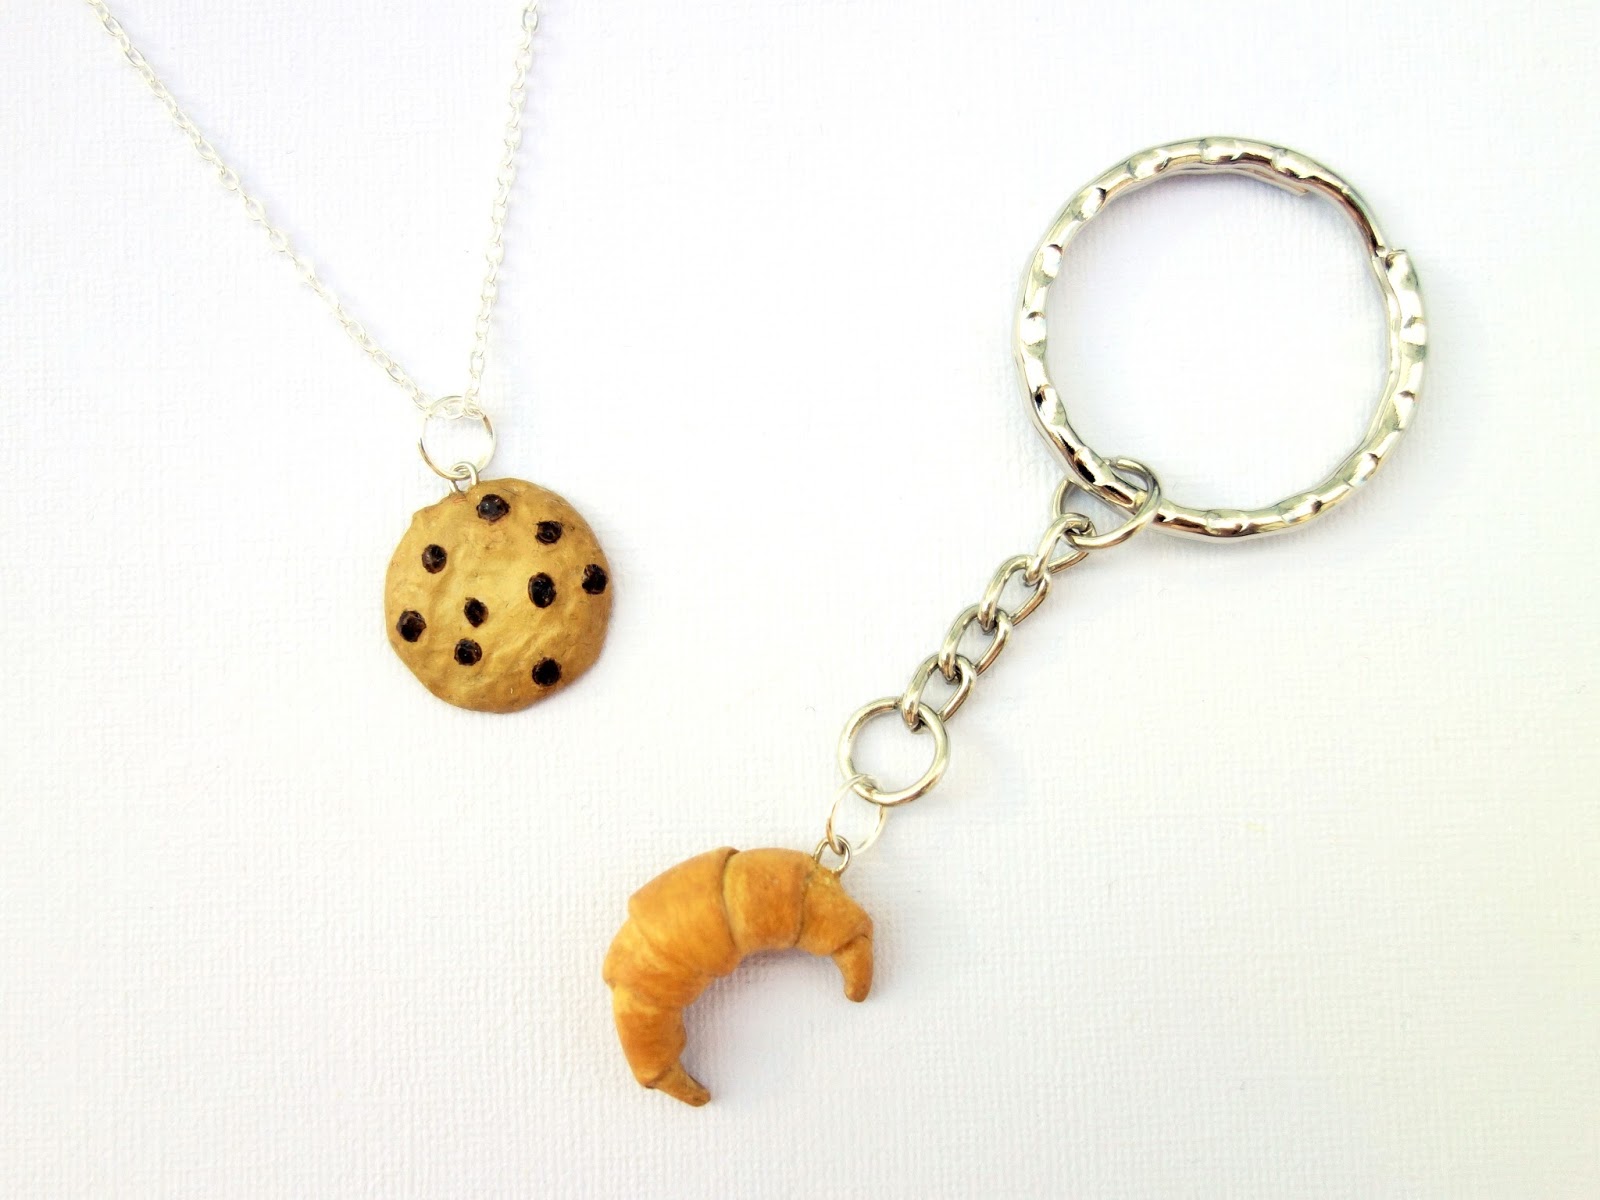
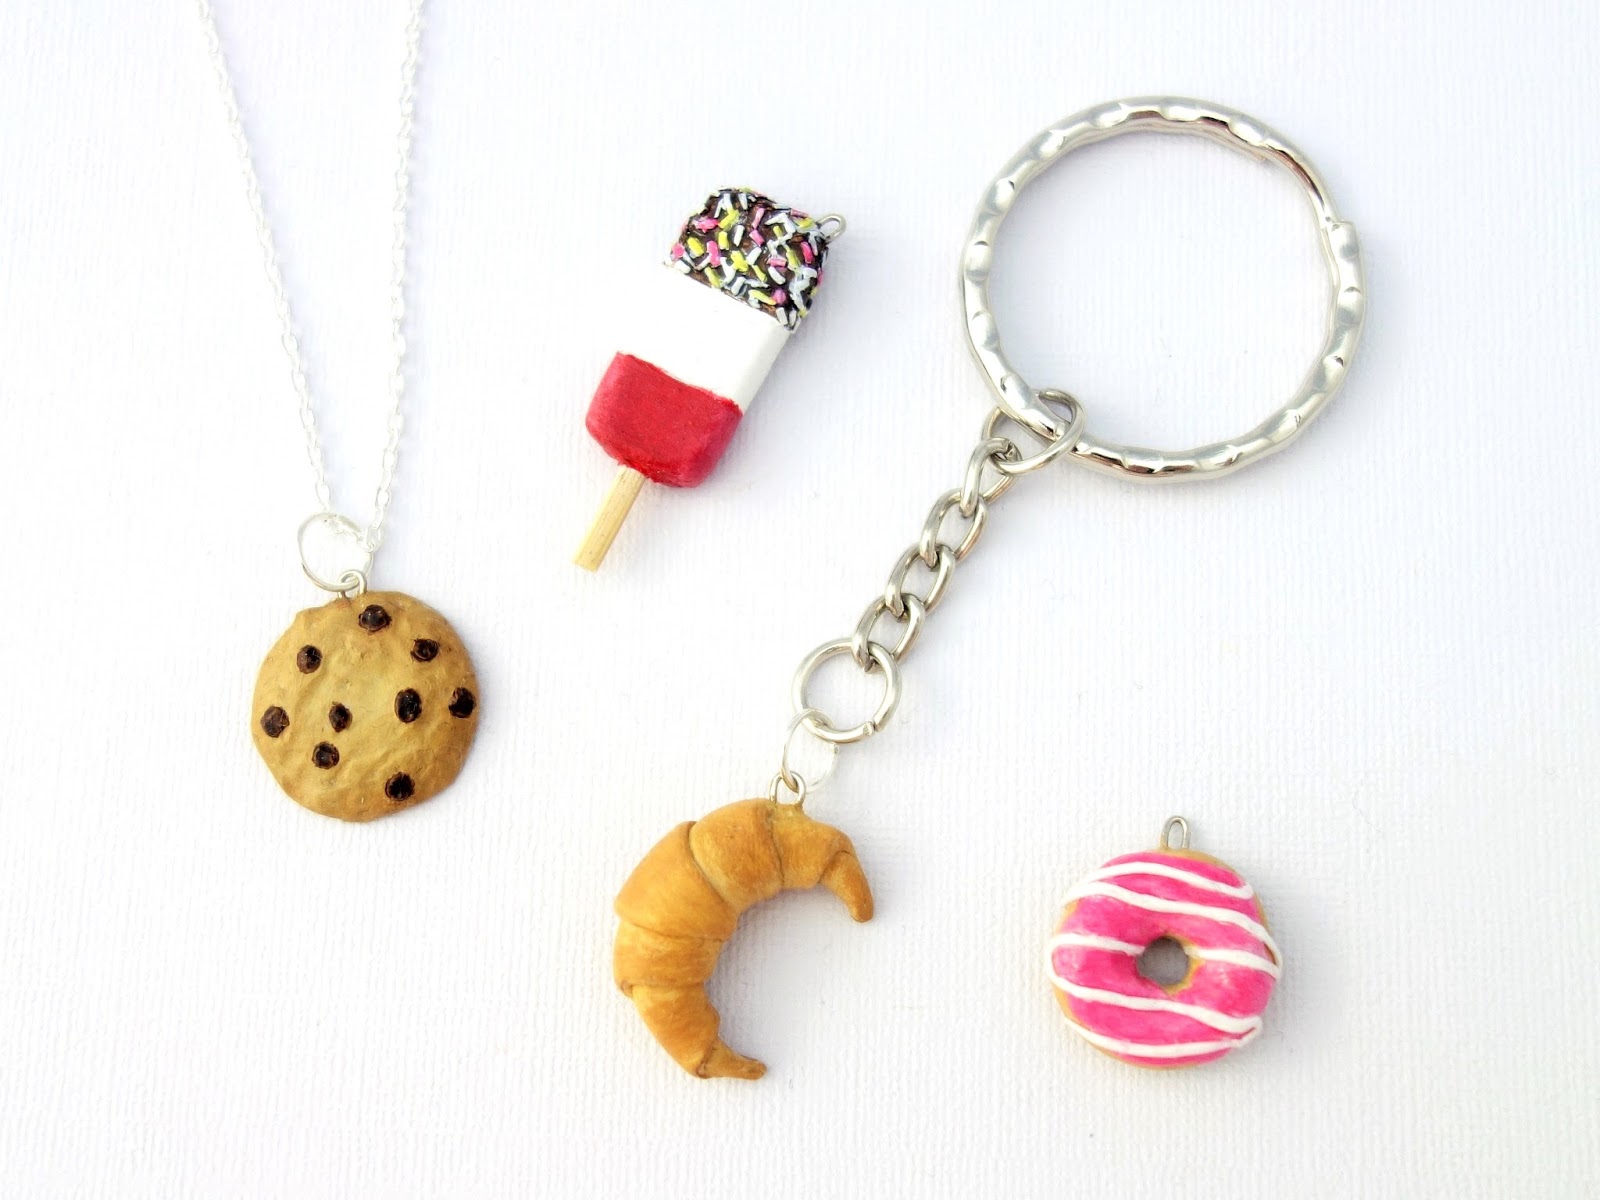
Sweet Treat Charms

I was looking through my old posts recently and was reminded about the miniature food made out of salt dough. It was a really fun project so I decided to try a similar thing using polymer clay. 

I got out my Sculpey and started modelling. This time around I decided to make the mini snacks into charms by inserting a small pin bent into a loop which could later have a jump ring attached to it.

These are the tools I used with the Sculpey. There's a craft knife, a 'pokey tool' (that was genuinely the name on the packet), and some dotting tools that were sold as nail art tools but work great for modelling.

After the charms had their time in the oven it was time to paint them. I used acrylic paint and my smallest paint brushes. 

With a jump ring attached these charms could become a necklace, a key ring or even part of a delicious foods themed charm bracelet.

 I think these turned out really cute and I'm already thinking what other sweet treats I could make in miniature. Any suggestions?

Tuesday, 25 June 2013

Miniature Fireplace

This is what was in the package to the Petersiks from Young House Love.
A miniature replica of their fireplace!

I've been waiting until they'd posted about it to share it with you.
Which they have done. Check it out here, especially if you want a size comparison of the fireplace with a chihuahua. 

I've been known to make the occasional miniature fireplace and when I saw their post with a step by step of how they made their actual fireplace the two things connected.
I thought I would make their fireplace, and then maybe see if they wanted it. It's not like I had anything else to do (still no job).
This would also allow me to try using plastic materials which I'd been introduced to on the model making course I took, instead of card and wood.

Half way through the process of making the miniature the Petersiks announced they were moving house. At first I thought 'oh no!' but then it was even more of a reason why they should have this model. As a memento of the fireplace they built in their own house.

As soon as the model was finished I emailed a photo to the Petersiks and received the best email back from Sherry. It started with an excited 'AHHHHHHHHH!'
I love it when people are emotive over email, and Sherry is that fo sho.
#bloggerfangirlmoment
A few more emails back and forth and the mini fireplace was off to Virginia.

The hardest part of the model, or rather the most time consuming, was the tiling. I had to cut and then lay so many tiny tiles.
And then do the grouting.
The tiles were made from thin pvc card, painted with acrylic to look marble-y, and then cut in to individual tiles. 

Recreating the decorative trim was tricky, but achievable!

I'm really proud of this fireplace, and am pretty overwhelmed by the response it's got over on Young House Love.
I'm also really happy that I could give the Petersiks a way to take something with them from their old house to their old house.

Tuesday, 22 May 2012

House progress: It's all in the details

All that's left to show you of my model house are the finishing touches.

Like the scattered leaves (mixed herbs) around the drain pipes.

The pink umbrella in the porch.

The slate house number and the doormat.

The concrete passageway down the side of the house.
Note the handy mirror in the background that makes the house look like it's part of a neighbourhood.

Here's hoping the examiners like what I've made.

Tuesday, 15 May 2012

House progress: The back bedroom

 It's about time I show you the back bedroom of my miniature house.

Bed, books, fancy picture.
Nothing weird here...except shouldn't there be a duvet?

Purse, pens, jewellery box.
Wait, are those fleck of blood on the drawers?

Oh, it must just be a nose bleed.
Dude, stop looking in the bin. You guys are gross.

Erm...I think it might be a bit more than a nosebleed...

Holy cowbags!!

The next day this happened.
No relation!
I just got a little too confident with the craft knife.
(Sorry if real blood makes you squeamish, but I had to live it! And I'm kind of a medical lightweight so I had to just sit very still for a while until I stopped feeling funny)
"But Lisa, if you had cut yourself the day before then you could have used real blood for your piece."
No! You're sick.
Geez.

Wednesday, 9 May 2012

House progress: Roof

The house has a roof!
Took long enough!

The roof panels start out like this.
Lots of 1x1cm square piece of card.
I got very excited the other day when my friend lent me a War-gaming making book and they'd used the same method for roof tiles. It means I'm doing it right.
Each roof tile is then glued to a piece of mount board which I measured out horizontal lines on.
That's the part that took a long time.
For example, when working on one panel I got through the last Harry Potter film, A Town Called Panic, an episode of The Voice and an episode of Casualty.
But, in my defence, A Town Called Panic has subtitles so I had to keep stopping to read. 

Once all the titles were stuck I went over them with chalk and charcoal to make them look weathered and added some 'moss'.

I made guttering and drainpipes out of drinking straws.
Cutting straws so that they're straight is hard, so just don't look too closely.
They really help the piece look like a proper house.

I also made lead flashing out of paper that I painted a silvery grey.
I didn't know that it was called lead flashing before this, so it's nice to see that I'm learning something.


Saturday, 5 May 2012

House progress: Rubbish bin

For the narrative side of my house I had to make a rubbish bin.

For this I had to be the crazy girl in the street taking photos of her own wheelie bins.
The whole thing is made of paper and card. Oh and a paper clip may have been involved.

The bin has been knocked over (the tyre marks in the background may have had something to do with it) and all the rubbish bags are spilling out.

I loved making this bin.
Is that weird? It's like when I made this toaster.
It was nice to make one small object from beginning to end in one sitting, and try really hard to make it really detailed.
I love it so much I'm tempted to exhibit it on it's own for the degree show!
Kidding. I haven't spent three months making the rest of the house for nothing.

Sunday, 29 April 2012

House progress: front bedroom

I hadn't planned what was going to go in this room of my miniature house as it wasn't going to be a plot point for the narrative of the piece.
I thought about just filling it with little cardboard boxes and calling it the spare room but my friend encouraged me to at least put a bed in it.

Which I did, and then I added some shelves and drawers.
And then I needed things to fill the shelves of course so I made some tiny books and dvds, a laptop, and iPod and even a magic 8 ball.
A few posters on the wall and suddenly this room was a teenage boys bedroom.

So I guess that's him, with the purple socks, hiding under the duvet.
But what's he hiding from?
The answer to that is in the other bedroom.
Which you'll see soon enough.

Sunday, 22 April 2012

Degree show tree progress

You've seen the tree I'm making for my degree show piece so now I'll show you some progress on the rest of the piece.

The tree slots into a hole in a piece of wood which is attached to a piece of MDF.
The MDF is 45x55cm which is the same size as the top of my plinths.

To make the mound which the tree sits atop a scrunched up newspaper around the block of wood and then papier mached over the whole thing to create a gradual slope. 
Then I put the whole thing in the airing cupboard to dry.

Unfortunately all that water and glue from the papier mache-ing caused the MDF to warp. All four corners were bending upwards.
Mega annoying.
To try and fix this I coated the underside of the MDF with watered down PVA and then balanced it on a roll of masking tape. I put stacks of heavy books on each corner to pull them down.
I did this a few times and it has helped, but it's still not perfect.

I painted the mound first with a mixture of brown paint, glue and dried tea and coffee.
Yummy.

I used this mixture to build up an area around the tree.
Then I painted over some of the brown with green as a base colour for the grass.

For the grass I bought some grass scatter from Ebay from a seller that specialises in model railway supplies.
Up until now I'd managed to avoid using supplies like this, but I couldn't think of an alternative way to make the grass.

Then I started making some tyre tracks.
Stay tuned to find out what that's about.
Related Posts Plugin for WordPress, Blogger...